 OTR Solutions setup guide1 min read
Connect OTR Solutions to Yolda
Yolda sends each invoice and its paperwork into your OTR account through OTR's API.
Step 1: Get your access key from OTR
- Yolda signs in with your OTR Client Portal login and an access key OTR issues.
- Ask OTR's integrations team, with Yolda copied:
Email to send
- To
- integrations@otrsolutions.com
- Cc
- partner@sfdify.com
- Subject
- API Integration Request
Hello OTR Integrations Team,

We factor with OTR and use Yolda as our TMS. Please send us an access key for your Carrier Integration API, so Yolda can submit our invoices and paperwork to OTR with our Client Portal login.

Name: [Your name]
OTR Client Requesting This: [Your company name]
Type of Integration: Carrier Integration (invoices and documents)
MC number: [Your MC number]
Contact Email: [Your email]
Contact Phone: [Your company phone]

Please also send our current Notice of Assignment.

Thank you,
[Your name]
Replace the marked blanks before you send or paste.
Step 2: Add OTR Solutions in Yolda
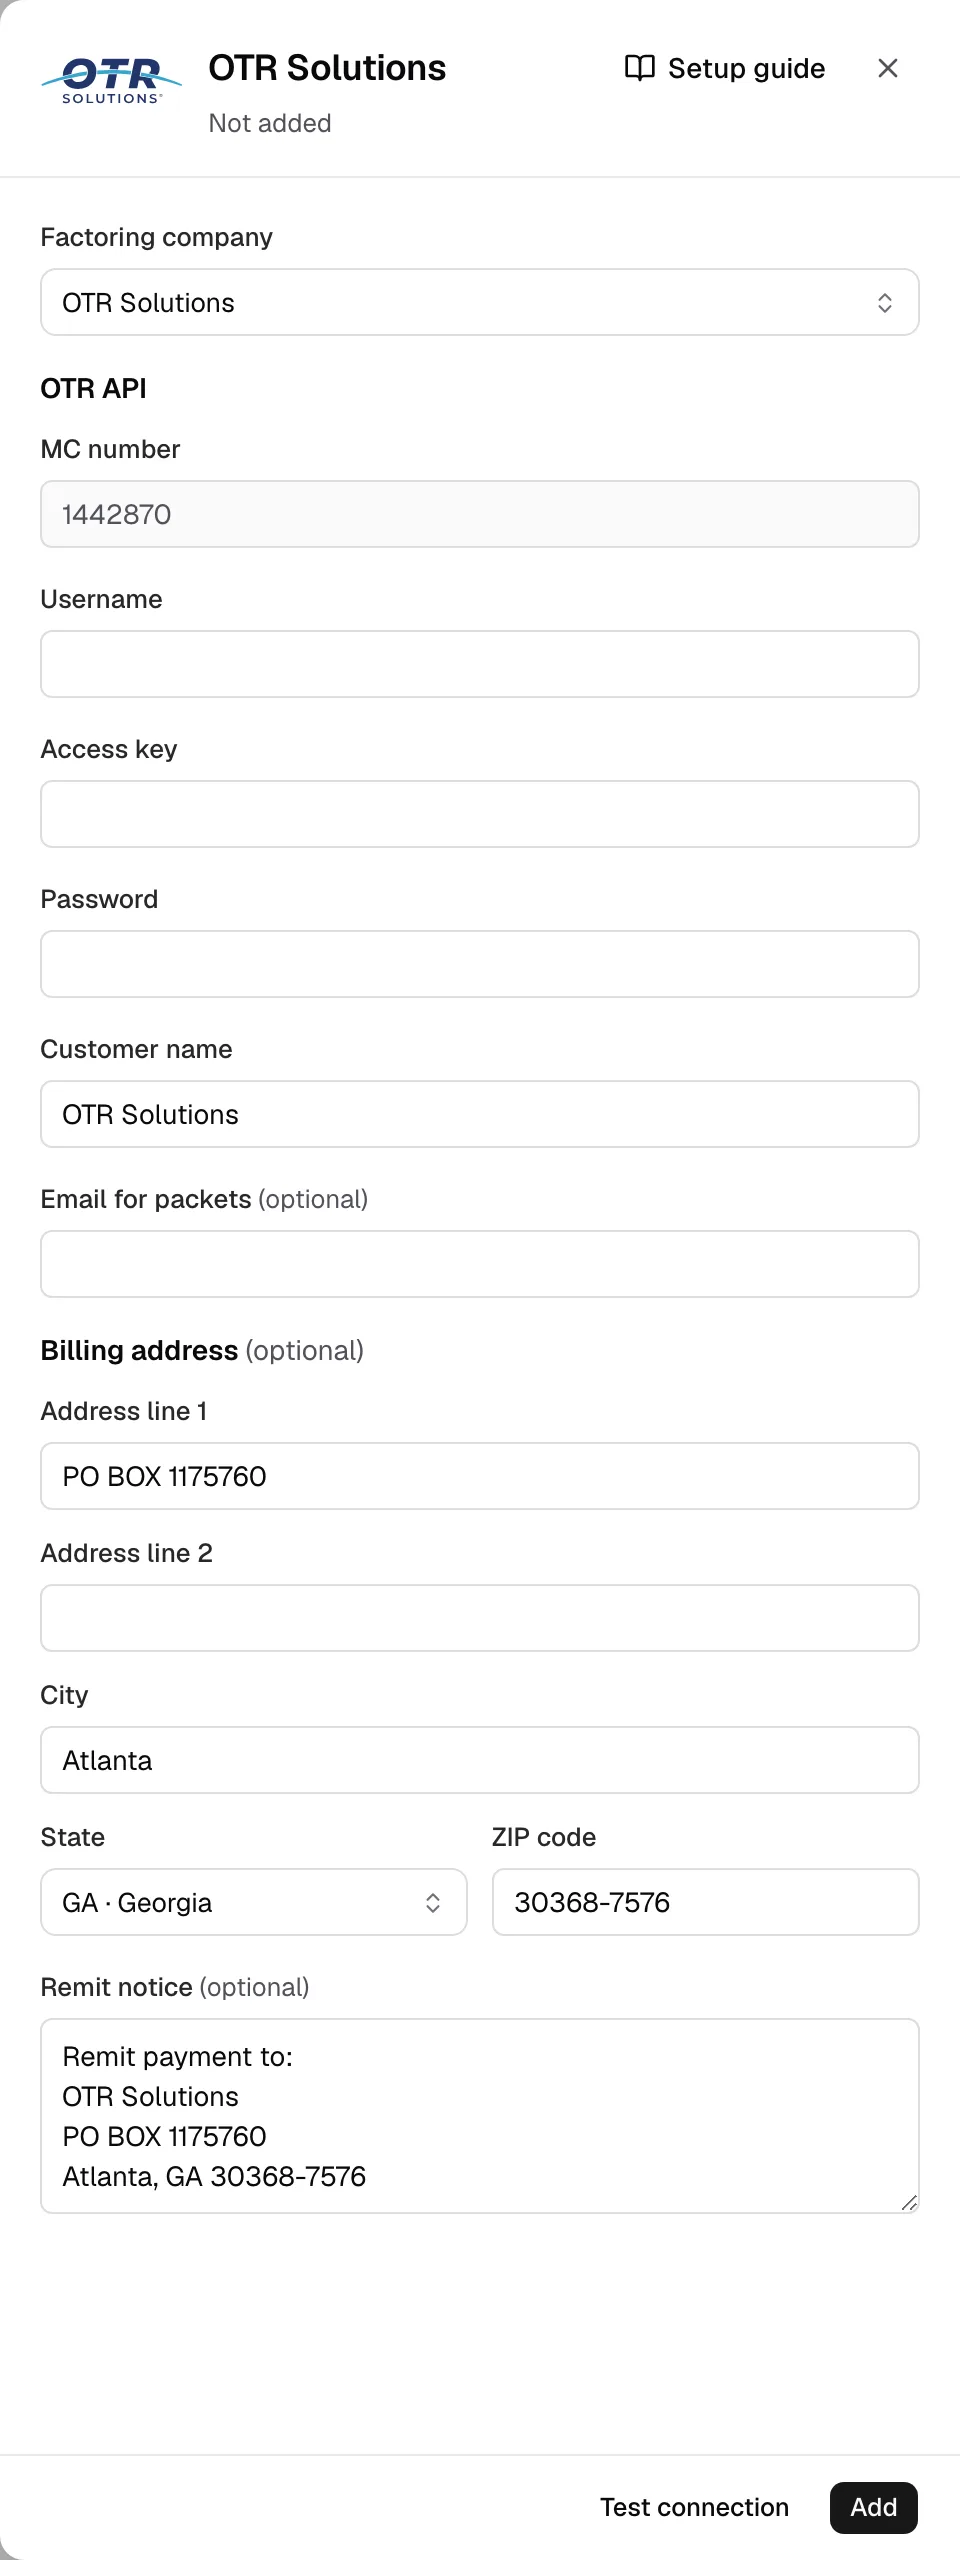
- Open Integrations, then Factoring, then OTR Solutions. Its sign-in sits right under Factoring company.
- MC number is yours, from Settings. Enter your Client Portal Username, the Access key from OTR, and your Password.
- Customer name reads OTR Solutions. Leave Email for packets blank: email is only the fallback.
- Billing address and Remit notice show OTR's published lockbox. Check them against your Notice of Assignment.
Step 3: Test and save
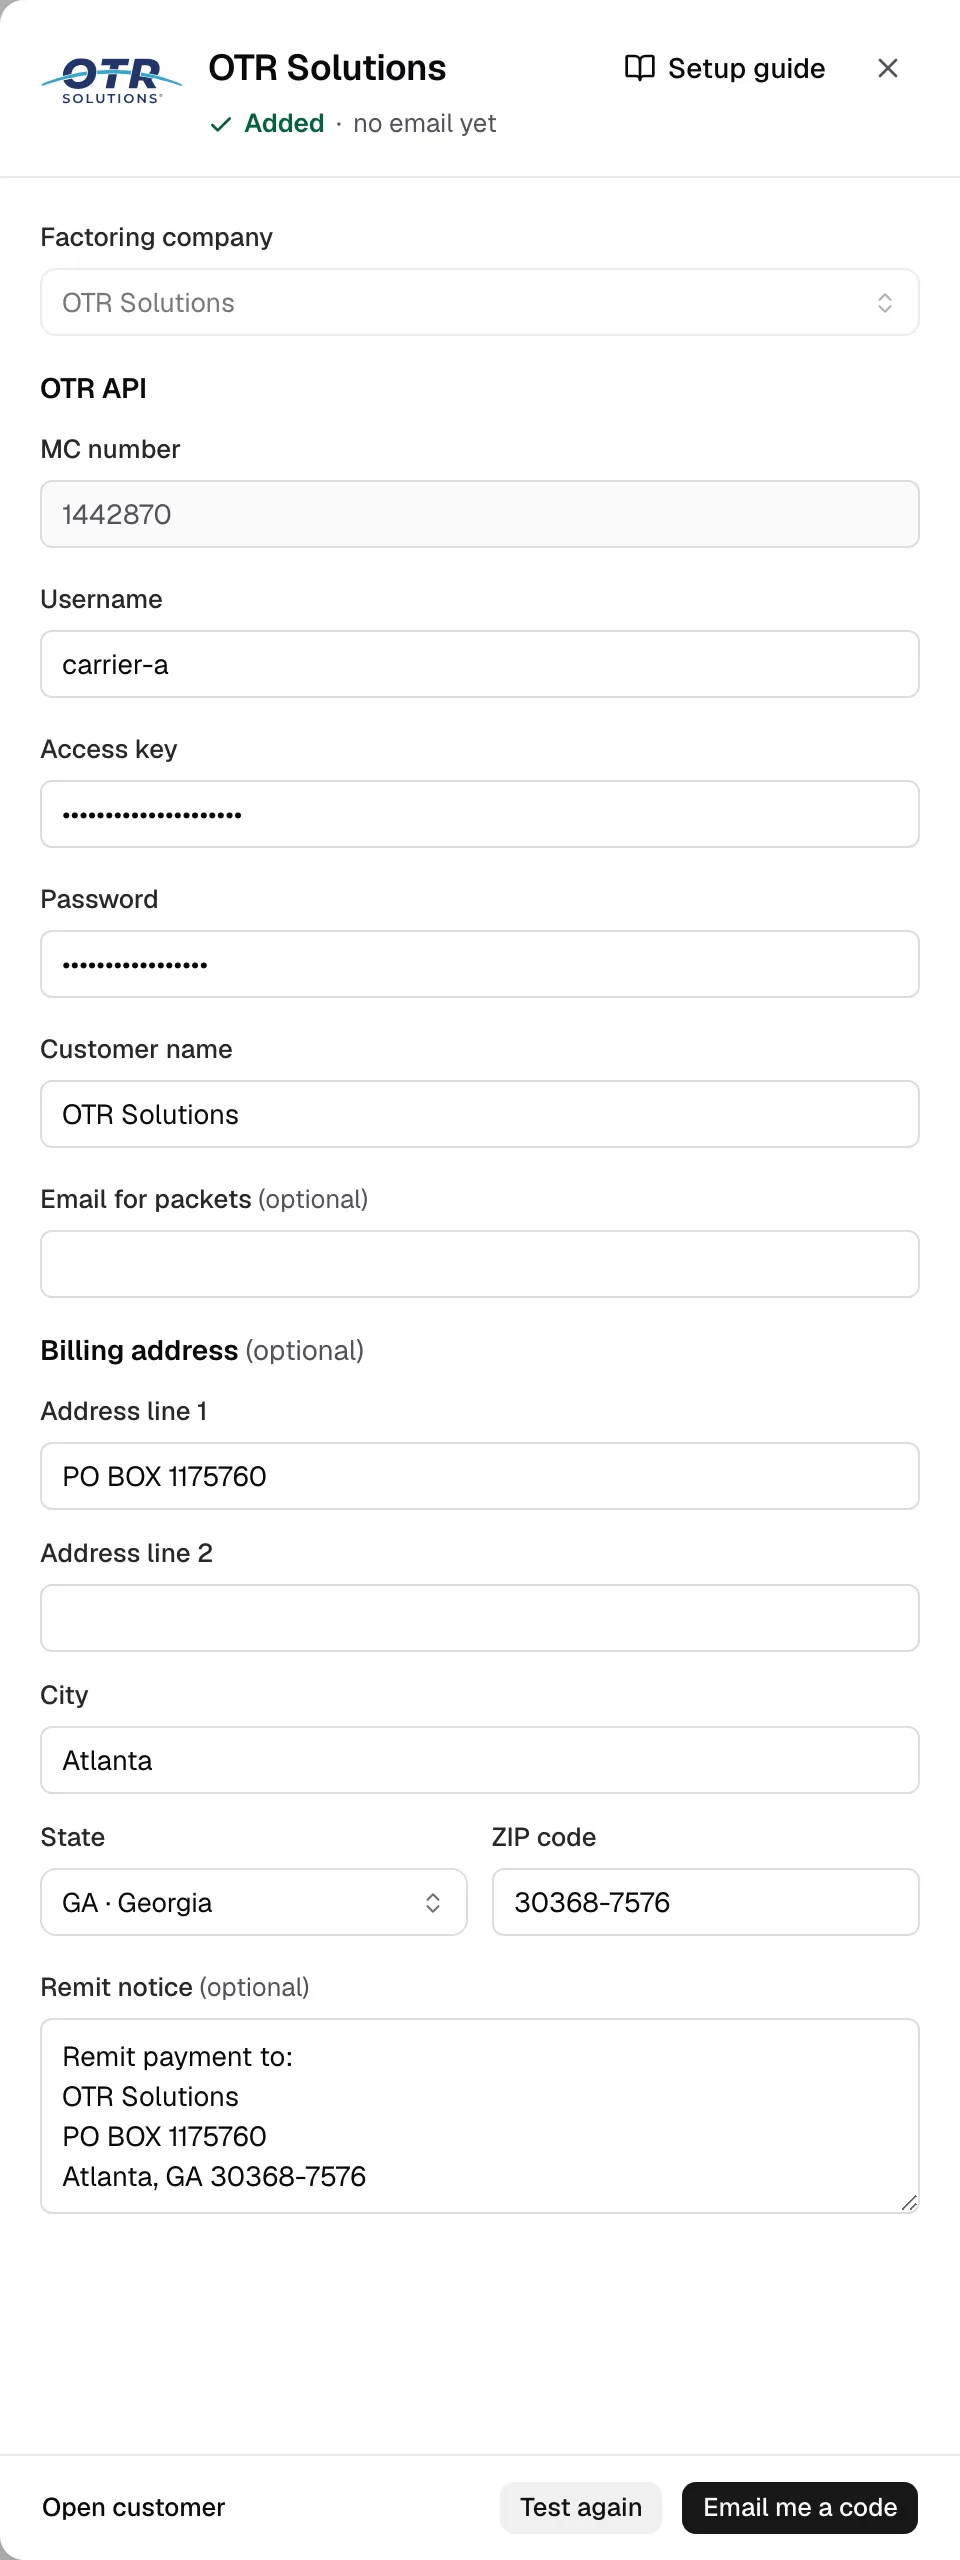
- Click Test connection. Yolda adds OTR Solutions, signs in to OTR and sends nothing.
- Click Email me a code, enter the code, then click Save.
Step 4: Send invoices
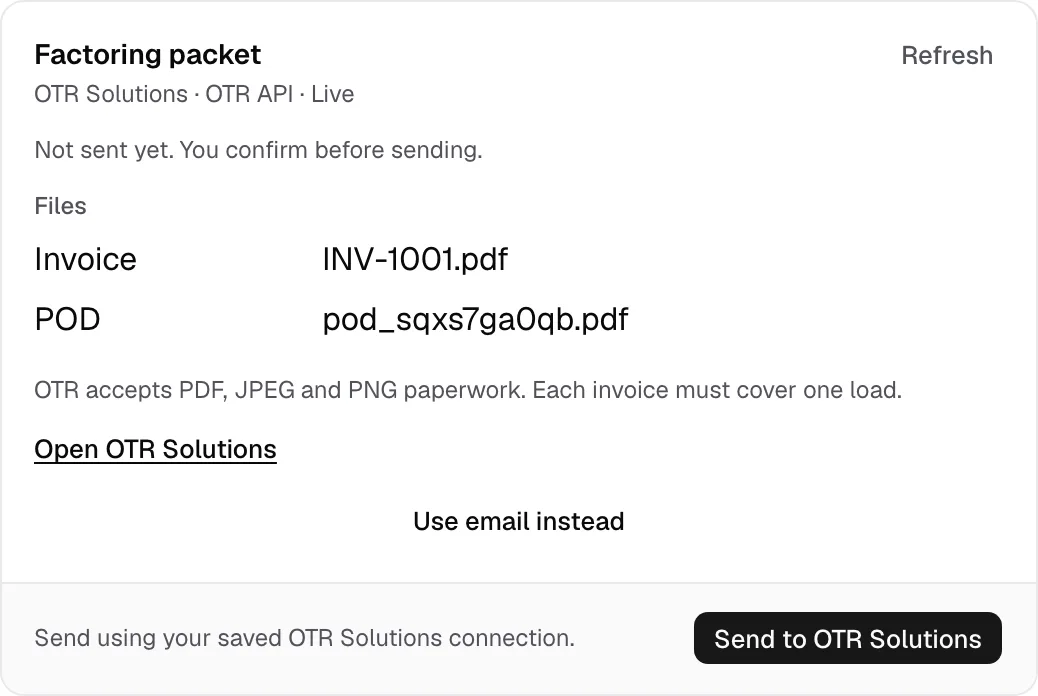
- OTR's drawer reads sends by OTR API under its name.
- In Finances, open an invoice and click Send to OTR Solutions, or tick invoices in Open invoices, click Create batch, then Send. Each invoice needs one load, the broker's MC number, and pickup and delivery city, state and ZIP.
- Yolda reads OTR's status at midnight and noon, or on Check status. It never records a payment: use Mark paid.