 Love's Financial setup guide1 min read
Connect Love's Financial to Yolda
Yolda uploads your invoices and paperwork to Love's SFTP server.
Step 1: Get your SFTP sign-in from Love's
- Email your Love's account specialist for your Username and Password.
Email to send
- To
- [Your Love's account specialist's email]
- Subject
- SFTP access for Yolda
Hello,

We are setting up Yolda as our TMS. Please give us SFTP access on sftp2.loves.com so Yolda can send our invoice batches to Love's Financial.

Please send:
- Username
- Password
- The Notice of Assignment to print on our invoices

Our MC number is [Your MC number].

Thank you,
[Your name]
[Your company name]
[Your email]
Replace the marked blanks before you send or paste.
Step 2: Add Love's Financial in Yolda
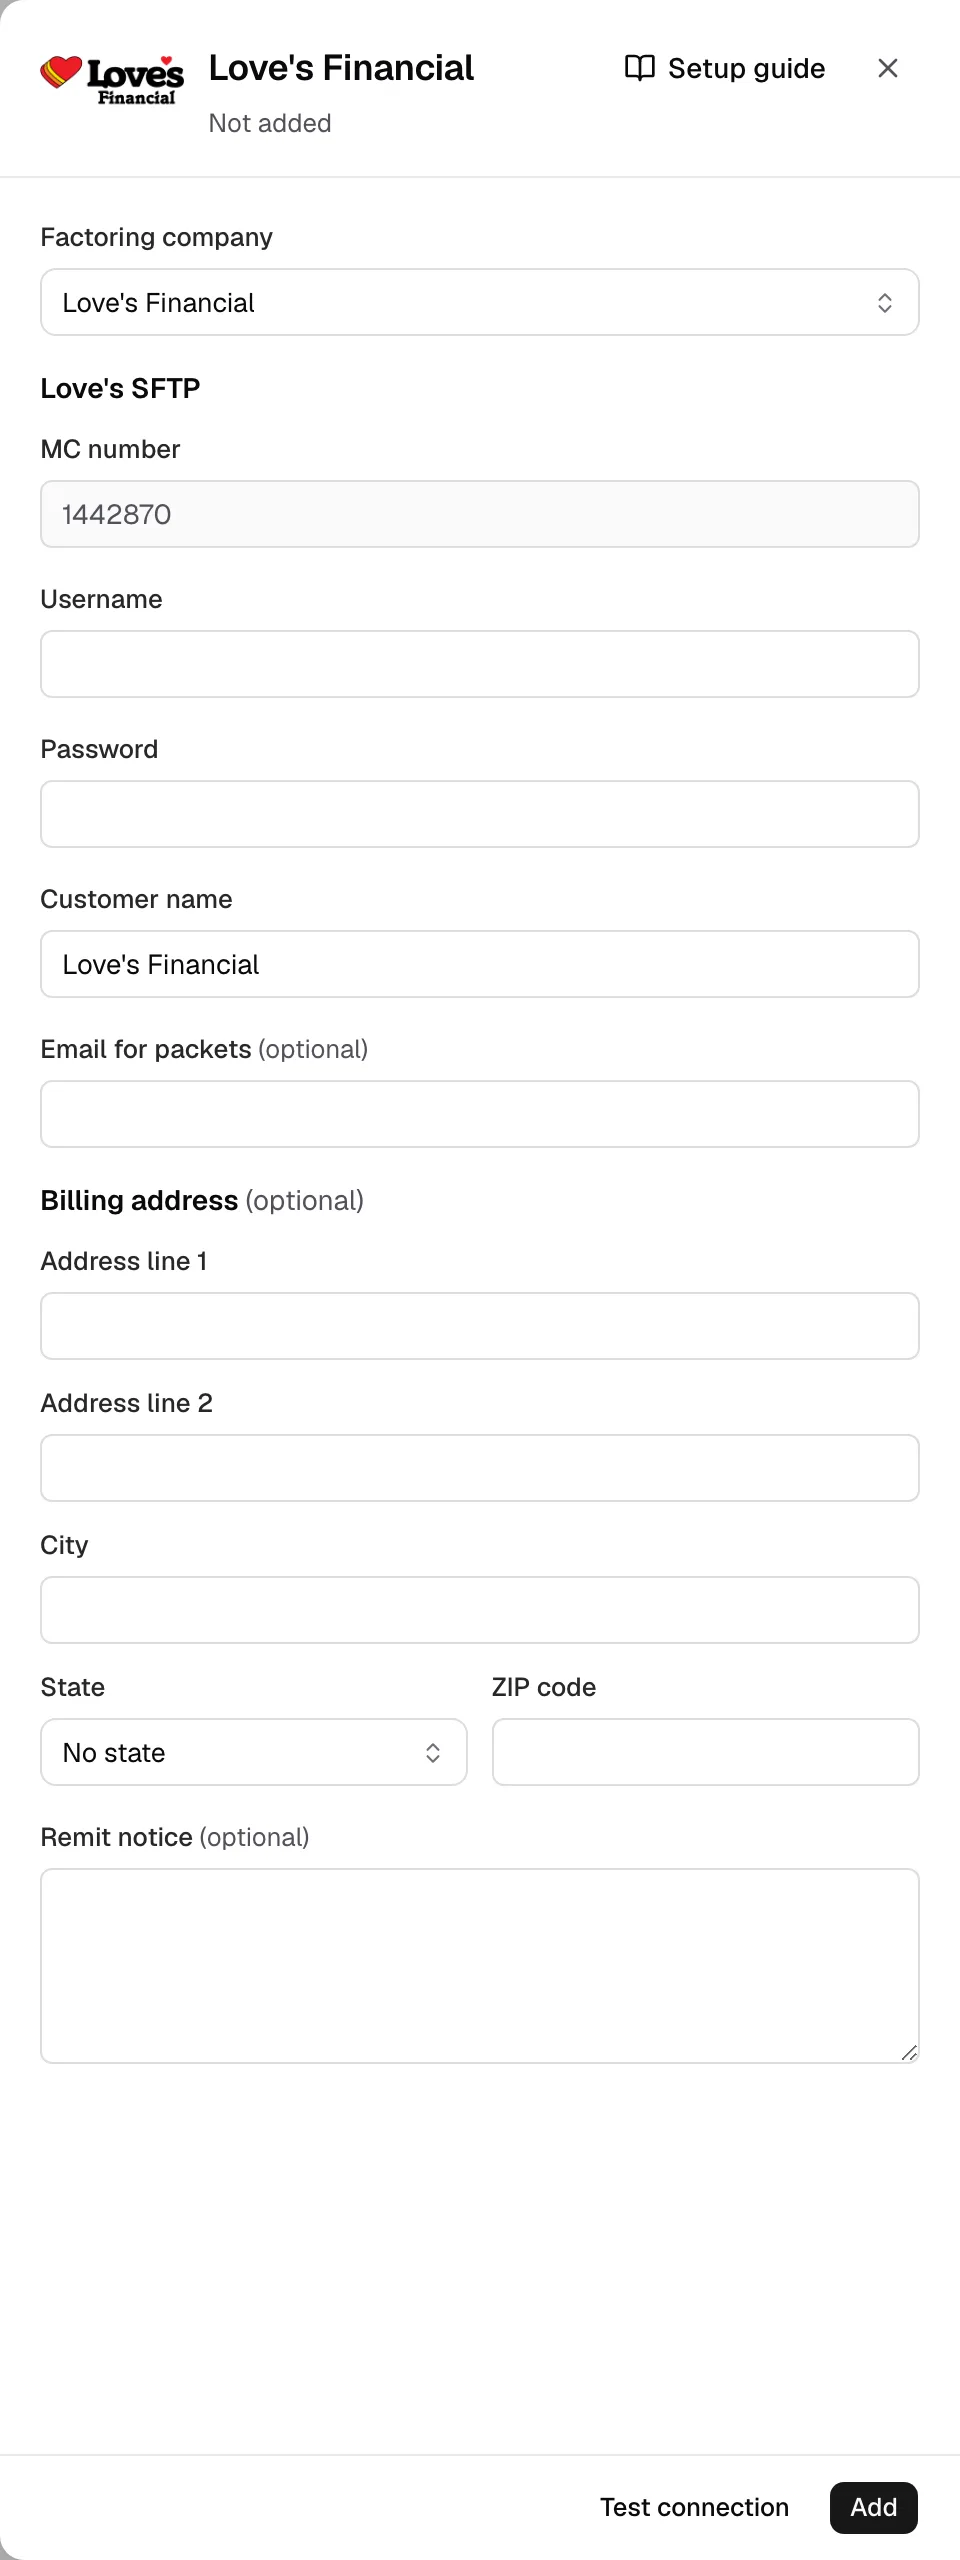
- Open Integrations, Factoring, Love's Financial. Love's sign-in sits right under Factoring company.
- MC number comes from Settings. Enter Username and Password from Love's.
- Customer name is filled in. Email for packets and Billing address can stay blank.
- Paste Love's Notice of Assignment in Remit notice.
Step 3: Test and save
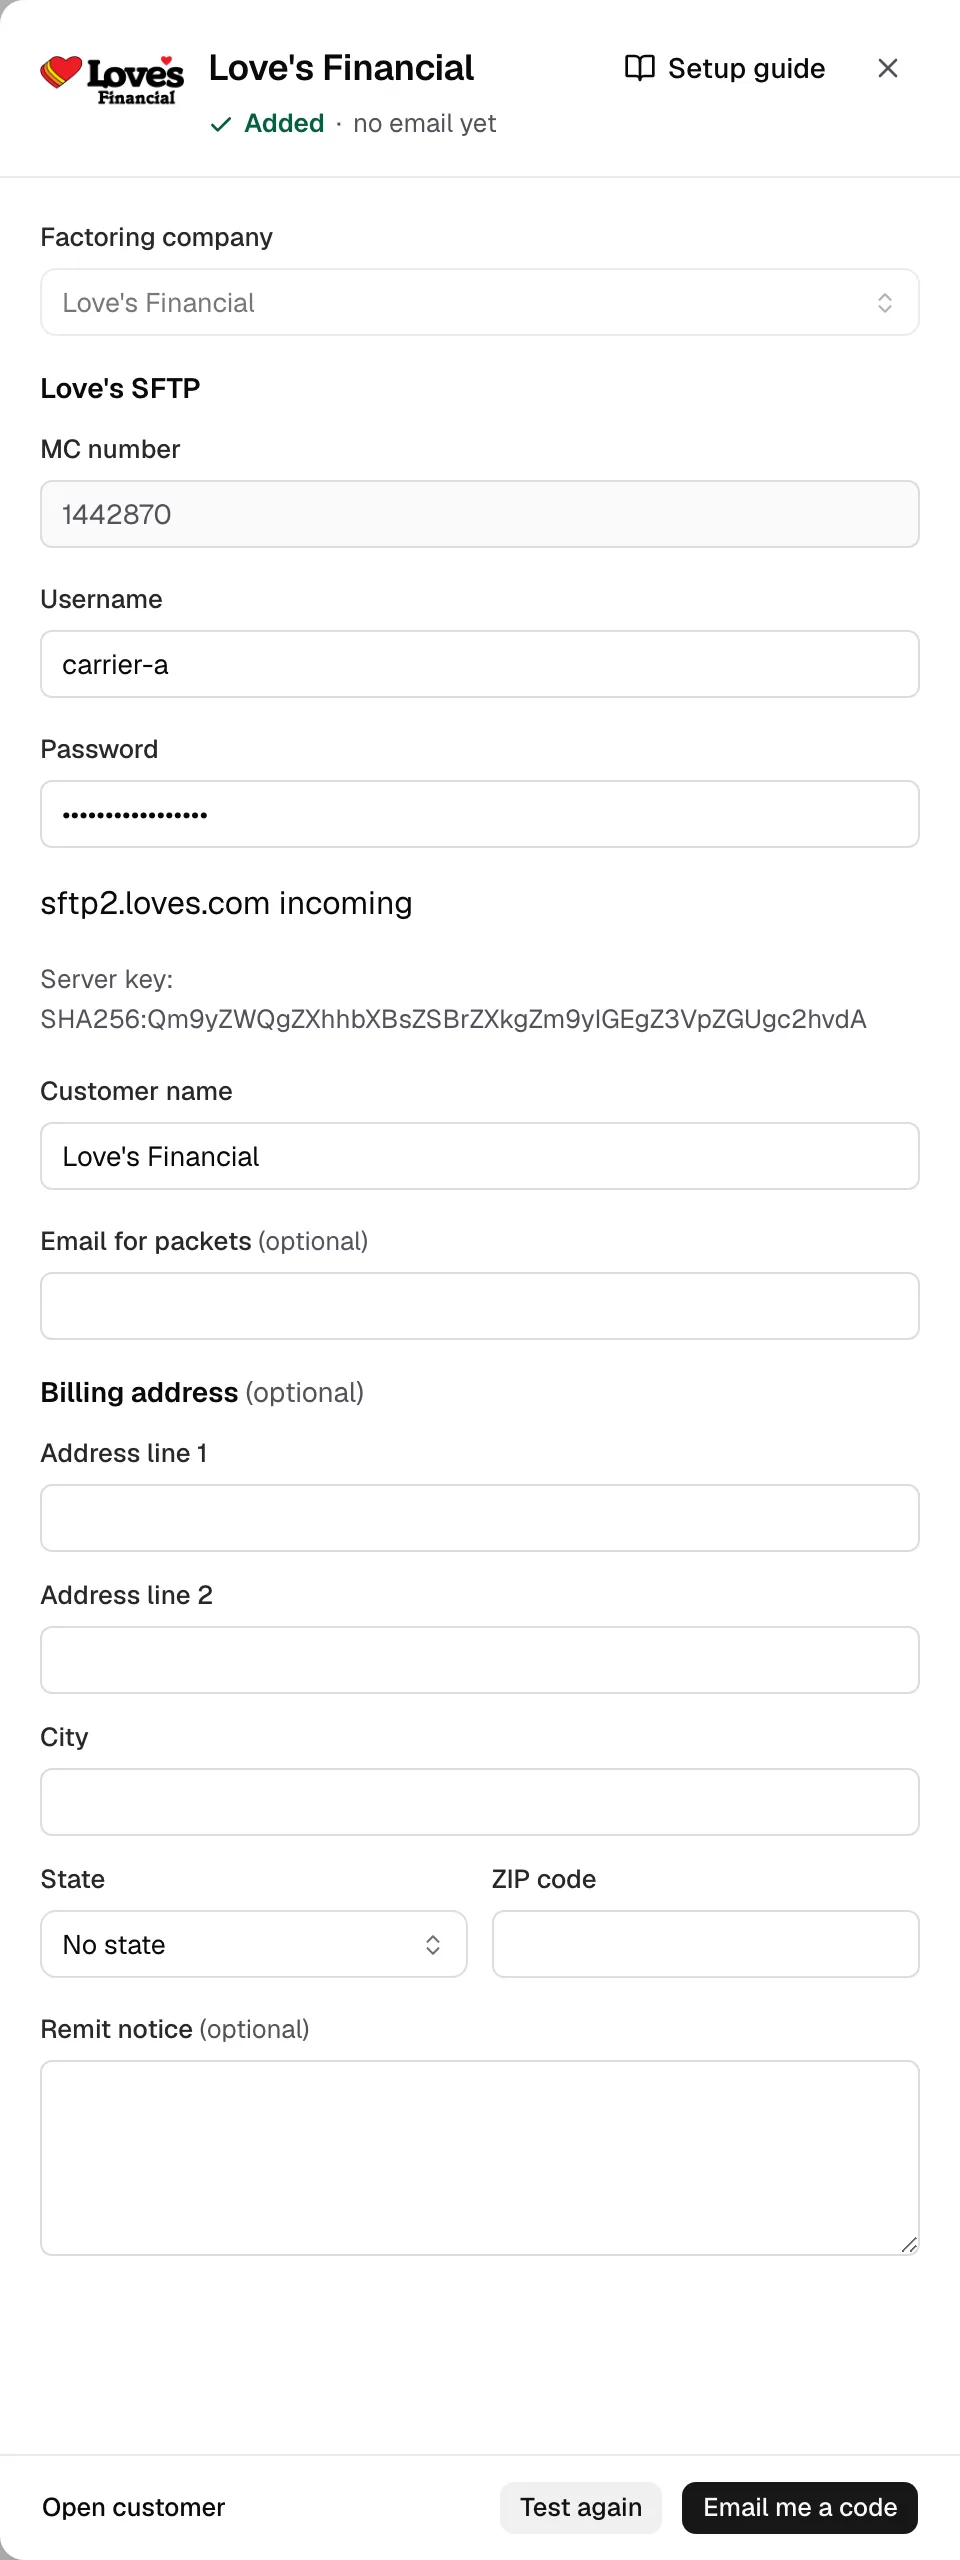
- Click Test connection. Yolda adds Love's Financial, signs in, writes nothing, and shows the folder and Server key. Yolda keeps this key and refuses a server showing another one.
- Click Email me a code, enter it, then Save.
Step 4: Send invoices
- Love's drawer reads sends by Love's SFTP under its name.
- One invoice: open it in Finances, tick Remit to a factoring company, pick Love's Financial, click Create invoice or Save changes, open it again, then Send to Love's Financial.
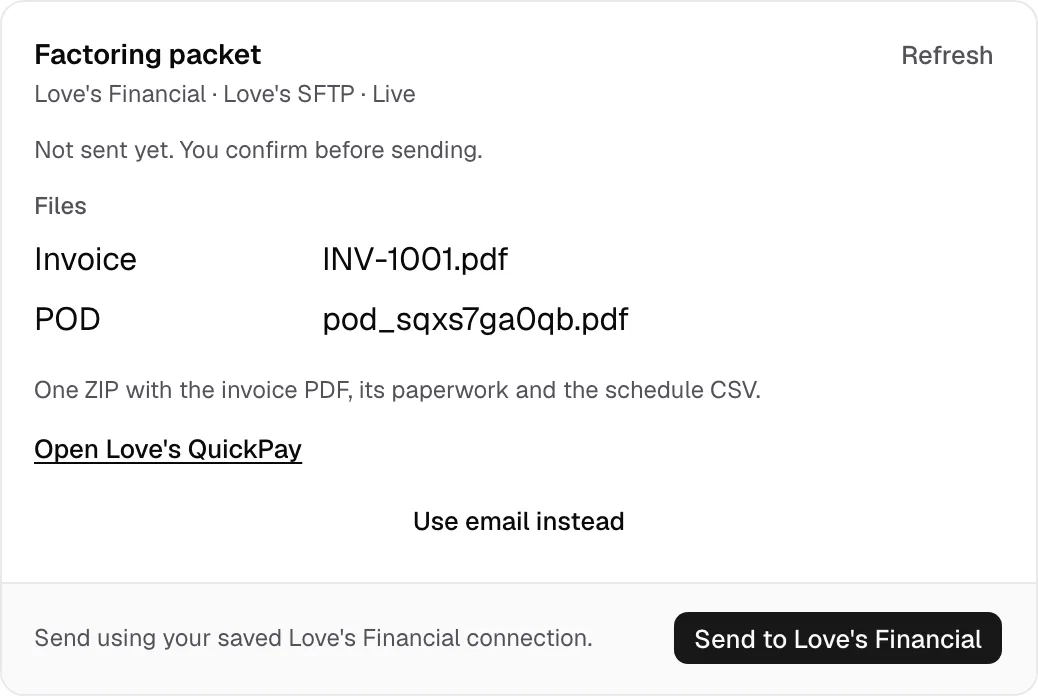
- A batch: tick invoices in Open invoices, then Create batch (Send an invoice batch).
- It then reads Uploaded to Love's Financial; Open Love's QuickPay opens Love's sign-in.
- After a single send the invoice stays under For review: click Record factoring in its row menu. When Love's pays, click Mark paid in Open invoices.